Disassembling the Front Panel
Next remove the main tuning knob. This is done by first sliding off the rubber traction shell that fits around the knob, then using a 1/16 inch allen wrench to loosen the setscrew under the traction shell.
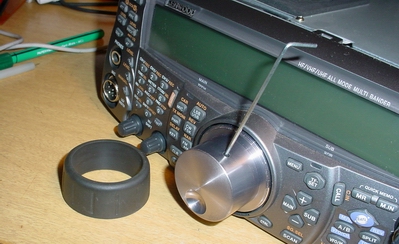
Next, remove the nut and the friction assembly from the tuning shaft. Note the order of the parts so you can assemble them the same. In the picture below, you will see that the lockwasher is below the spring washer. I do not think this is correct, so I reassembled mine with the spring washer below the lockwasher. It seems to work ok either way.
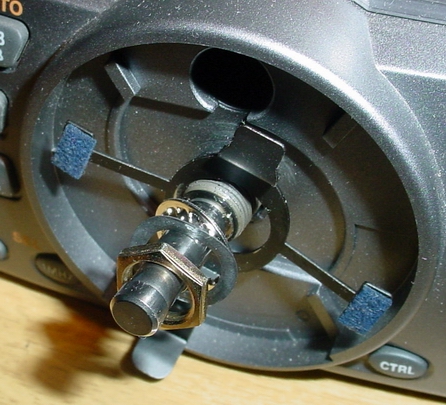
Referring to the picture above, use a Phillips screwdriver to remove the screw that is recessed in the hole just above the tuning shaft.
Now you are ready to remove the front panel. First remove the top and bottom covers from the TS-2000. Next remove the 4 small end screws (2 on each side) that hold the front panel.
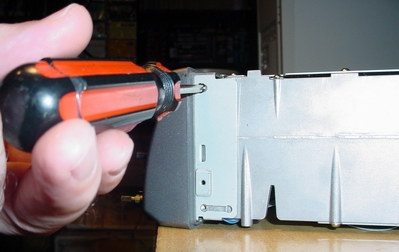
Prop up the front of the rig so it is supported about 2 inches above the table, and carefully remove the front panel and place it face down on the table, exposing the connecting wiring.
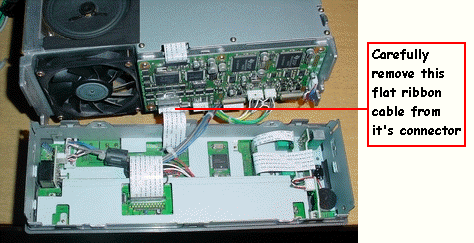
There is a flat wire and a cable bundle leading to two plugs that must be removed next. See above picture for the ribbon cable. Be very careful removing and inserting the ribbon cables. Get plenty of light so you can see what is happening well and gently rock the cable from side to side while pulling or pushing. They fit tight.
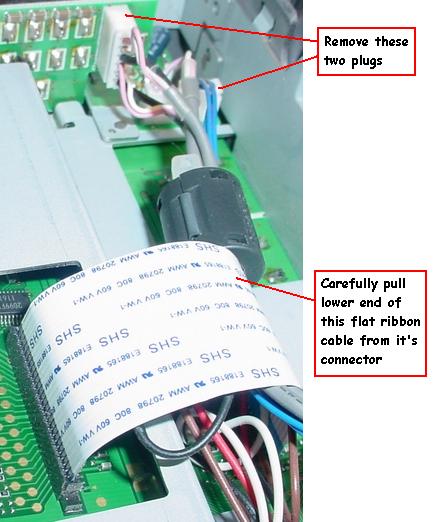
Note how the cable bundle is routed under the wide ribbon cable shown above, and how the colored wires from the tuning encoder are folded and tucked under the same ribbon. When reassembling, mount the encoder to the front panel shell before putting the shell back on, then make sure you pull all the excess length of the colored wires through from the front as you install the shell onto the front panel frame, and then tuck them neatly back under the ribbon cable .
Remove one end of the wide flat ribbon cable. I think it is easier to remove the lower end. rather than trying to deal with putting it back together through the access hole on the upper end.
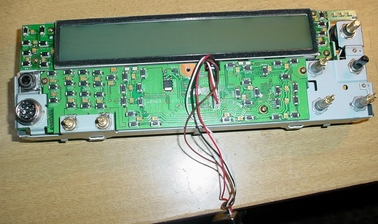
Now that the front panel is completely disconnected from the TS-2000, move it to a clean, open bench area to work on it. I neglected to take any picture of the next step, removing the front panel plastic shell. There are six detents, 3 on top and 3 on bottom that you must release and then the shell can be removed. Below is the front panel with the shell removed. Note how the optical encoder wires pull through from the back to allow it to be laid aside. Be careful to get those wires back through to the rear when reassembling, or they will cause you trouble.
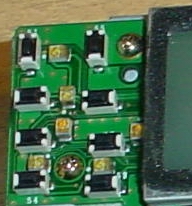 The lamps are mounted on the
back side of the LCD subassembly, so it must be removed
next. There are 4 screws that hold it on. Two of them are
shown in this photo.
The lamps are mounted on the
back side of the LCD subassembly, so it must be removed
next. There are 4 screws that hold it on. Two of them are
shown in this photo.
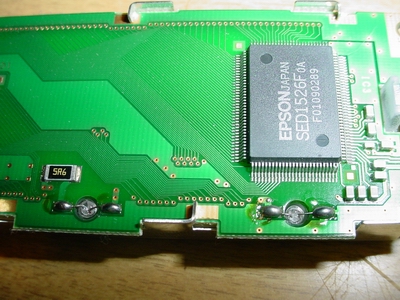
Turn the LCD panel upside down to access the lamps. Two of them are shown in the photo below. You can check the lamps with an ohm meter to find out which ones are open, but I recommend changing all six lamps at once because the rest will probably go out soon. Carefully unsolder the old lamps and solder in the new ones. Watch out for solder splashes or drippings and clean up any excess solder or flux.
That's it (Easier than Robbing Fort Knox :) Reassemble the TS-2000 and enjoy a fully lit front panel again.